Let’s make some fun and easy Valentines! Valentine’s Day is a lovely holiday to create beautiful arts and crafts with children. Making thoughtful valentines for friends and family is sweet and kind. Children are motivated and excited to make their original valentines for special people in their life. Besides, it is a fun way to exercise little fingers, boost creativity, enjoy, and feel the love. Scroll down to explore are super fun and easy valentines.
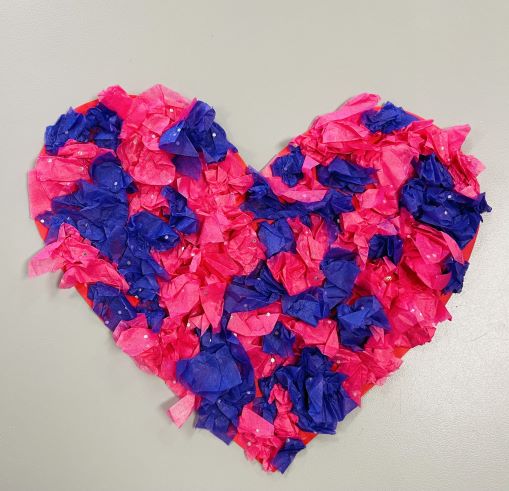
Tissue Paper Valentines for Children
Supplies: colorful tissue paper, glue, and paper, pencil and scissors.
Instructions: Pre-cut hearts for preschoolers and older children can draw and cut out their hearts. Cut or rip tissue paper into small piece, crumple tissue paper, and glue into the heart. Create a beautiful ruffled heart.
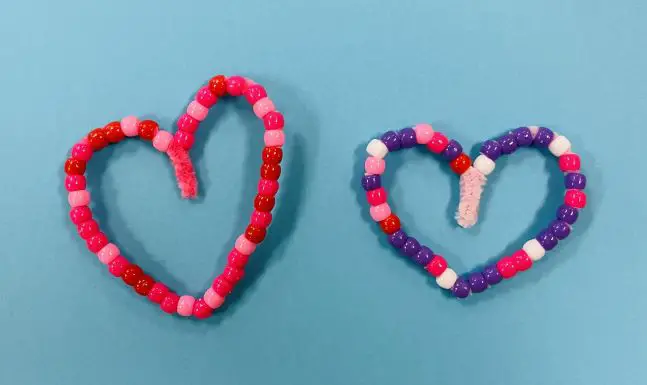
Don’t Break My Beaded Heart
Supplies: pipe cleaner and beads
Instructions:
Bend the piper cleaner in half and thread the beads onto the pipe cleaner.
Leave little space to twist the pipe cleaner together.
Supplies: cardstock, yarn, tape, hole puncher, and scissors.
Instructions:
Cut out the heart and punch holes around it.
Cut a long piece of yarn, tape the end of the string on the back of the heart, and place the tape around the string’s tip.
Lace your unique design. Lace around the heart, inside the heart, mix it up and make your lacing design.
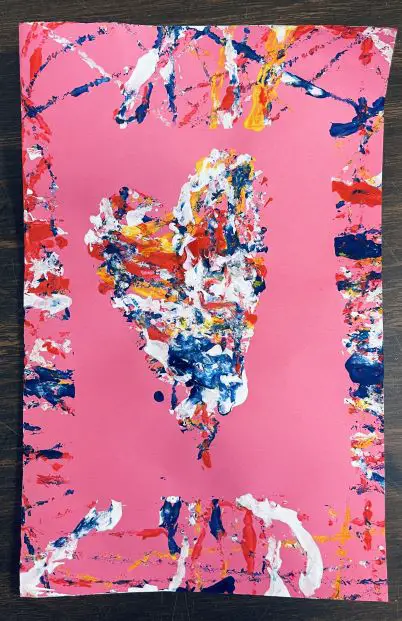
Marble Paint Valentine
Supplies: marbles, paper, box/plastic tray, paint, tape, and paper heart stencil.
Instructions: We made marble paint Valentine cards, bend the paper in half to make a card. Place the heart stencil. Tape the stencil to the card paper, the best way on the back, so it does not leave tape marks. Place the card in the box/tray, tape it to the bottom of the box/tray, dip the marbles on paint, and let them roll in the box, move the box around to create a unique design. Use as many paints or as few paint colors as you wish. Remove the stencil for the beautiful end valentine!
Tip: We used three different paint colors and few marbles. Place your painted stencil inside the card for a personal message. We made our paper heart stencils. In case, you need easy planning Marbles, Heart Stencils, Trays, Pink Paint, Purple Paint, and Red Paint.
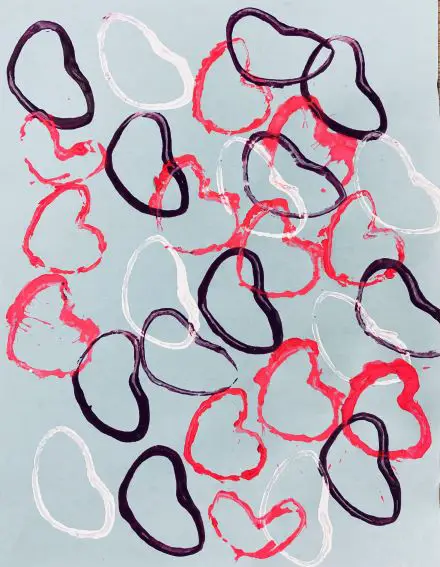
Dip and Stamp Hearts Valentines for Children
Supplies: recycled toilet roll/paper towel roll, paint, and paper.
Instructions: Shape the recycled roll into a heart shape, dip in paint, and stamp.
Tip: Place a rubber band around the roll to maintain the heart shape, especially for younger children.
Yarn Hearts Valentines
Supplies: yarn, mod podge, water, wax paper, and paper heart shapes.
Instructions: Prepare mod podge
Tip. The more yarn you use to make your heart, the longer it takes to dry. Mod Podge.
Draw a Card or Copy a Cute Card
Supplies: paper, crayons, colored pencils, or markers.
Instructions: Find cute Valentine designs to copy.
Tip: We used Pinterest and Esty for fun ideas.
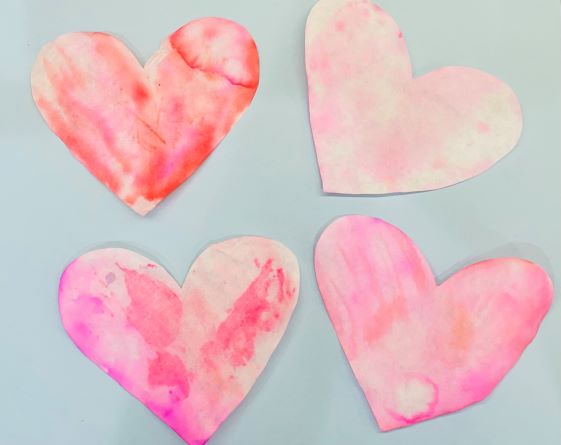
Coffee Filter Hearts
Supplies: coffee filter, scissors, markers, and eyedropper.
Instructions: Cut out a coffee filter heart. Color it with markers, and then squeeze little drops of water. Markers will bleed and create a beautiful color mix. Let it dry for a bit.
Tip: For eyedroppers, we save droppers from the liquid vitamins or you can get a pack of pipettes if you need them for the classroom.
Finger-paint Hearts
Supplies: paint and paper.
Instructions: Dip thumb or pointer finger in the paint to make hearts.
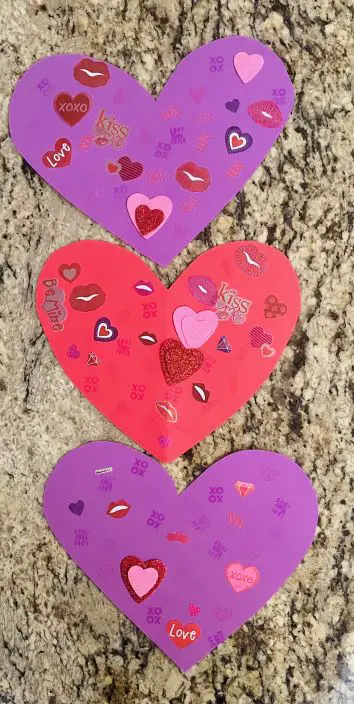
Heart Collage Valentines for Children
Supplies: paper, scissors, possibly glue, and whatever art media you would like to use (stamps, stickers, tape, ribbon, etc.)
Instructions: Provide children with pre-cut hearts, or older children can cut out the heart independently. Decorate your valentine as you wish.
Tip. We used stickers, stamps, and glitter hearts from the Dollar Store.
Summary
Creating art provides children with an opportunity to express themselves improve fine motor skills, and have fun. Spread the love and let valentine’s creations begin!
If you enjoyed this article, please share it with a friend!
*Kids Groove and Grow is a participant in the Amazon Services LLC Associates Program, an affiliate-advertising program designated to provide means for sites to earn advertising fees by advertising and linking to Amazon.com.
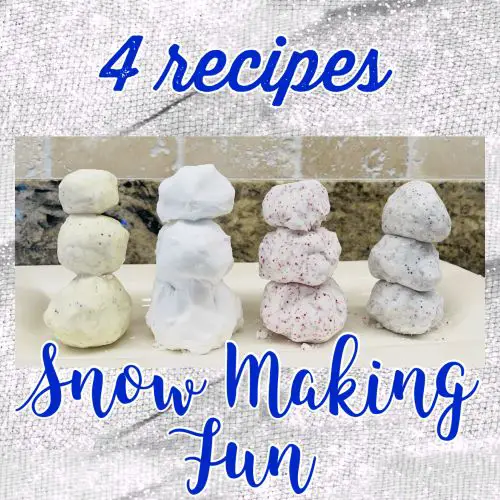
We enjoyed trying 4 fun snow recipes today. Children in Arizona miss snow in the winter. Therefore, we need to use alternative ways to create our snow fun. We made four different snow recipes. We played, we made a big mess, and we voted on the best fake snow concoction. My six-year-old and nine-year-old kids participated in the snow testing process, as I need the best fake snow recipe for my preschoolers. We had hours of fun and sensory play, and it was worth all the mess!
Sensory play has enormous benefits on child development. Encouraging toddlers and preschoolers to explore activities that involve senses while playing, creating, and discovering is incredibly vital. It helps to form new brain connections that support multiple areas of development.
Although sensory-rich play is a critical way of learning for babies, toddlers, and preschoolers, it is also enjoyable for older children. My nine-year-old son enjoyed following the snow recipes, playing with the snow textures and thrived on trying all of the snow recipes. Additionally, my six-year-old daughter played with the snow concoction the entire time and beyond while we tested all snow designs.
Please decide if you will take our word for the best snow recommendation or if you desire to test all four DYI snow recipes. Let us explore our 4 snow recipes.
Instructions: Mix it all. Place in the freezer for 15 minutes.
Tip: This recipe is for one child; if you need more snow quantity for more children, double the ingredients.
Impressions: Feels like real snow, cold, realistic, squishy, sticky, appears like real snow.
Snow Recipe #2
Materials: 2 1/2-cups baking soda and 1/2 –cup white hair conditioner, glitter optional.
Instructions: Mix it all.
Tip: This recipe makes enough snow for two children.
Impressions: soft, white, fun, feels cold, smells good, enjoyable, easily sticks together to makes snowballs, great for cookie cutters and scooping, we added pink glitter for more fun
Snow Recipe #3
Materials: 2-cups of baking soda and ½ bottle of shaving cream and glitter optional.
Instructions: Mix it all.
Impressions: fluffy, soft, white pleasant, fun, easily sticks to make a snowball, feels like kinetic sand, also feels like pizza dough consistency, calming, excellent to use cookie cutters, scooping, smells like shaving cream (add a few drops of scented oil or baking extract to transform the scent).
Snow Recipe #4
Materials: 2-cups cornstarch (corn flour) and ½ cup of vegetable oil and glitter optional.
Instructions: Mix it all.
Impressions: yellowish color, smooth, silky, vibrating squeeze, squeaky, sticks together but also easily falls apart, enjoyable and unusual consistency, cookie dough consistency, unique, and odorless.
Although we live in Arizona and we do not have easy snow access in the winter, we enjoyed making our own fake snow. We truly enjoyed all 4 snow recipes. We made our discoveries about snow textures, colors, consistency, and smell. Playing with snow stimulated imagination, creative thinking, and inspired confidence. It was an amazing sensory experience! Please check out 4 snow recipe evalution.
If you are unable to watch our full 4 snow recipe evaluations, I will let you in on our favorite snow recipe. Our favorite snow recipe was Snow Recipe #3, the snow made with baking soda and shaving cream. This recipe was a clear winner! However, you can’t go wrong with any of the snow recipes. Even if you live in the snowy part of the world, try this fun concoction when you are stuck at home. Making snow fun guaranteed!
If you enjoyed this post, please share it with a friend!
*Kids Groove and Grow is a participant in the Amazon Services LLC Associates Program, as am affiliate advertising program designated to provide means for sites to earn advertising fees by advertising and linking to Amazon.com.
Wintertime is a perfect time to create fun arts and crafts with children. How about some fun and easy igloo art ideas to keep children entertained and happy. Learn about igloos, support creativity, and practice fine motor skills. Most of the supplies you will find around your house or a quick trip to a dollar store might be worthwhile to create your charming igloos.
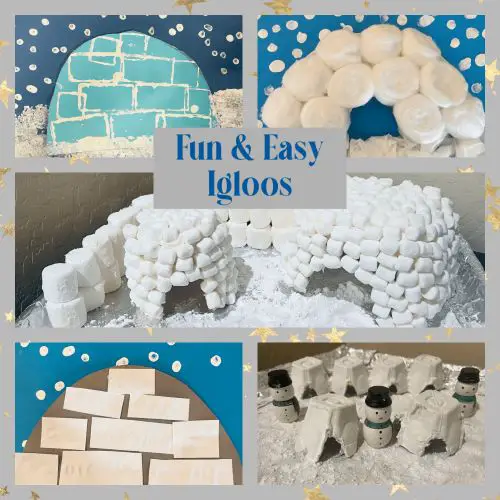
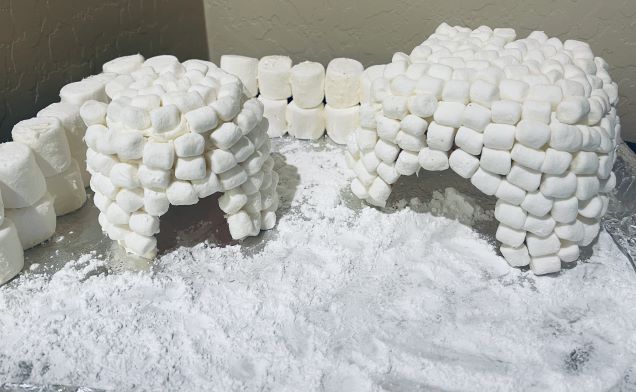
Marshmallow Igloo
Supplies: empty plastic water or milk bottle or small-recycled container (i.e. cereal, butter, cream cheese), butter or plastic knife, white frosting, and marshmallows
Instructions:
Cut out an igloo opening in the recycled container.
Use white frosting as glue and spread it all over the container.
Arrange the marshmallows on the sticky container to make an igloo.
Tip: Place an aluminum foil on the cookie sheet, sprinkle powdered sugar or flour to make a winter village. Build a marshmallow fence, and play with figurines or animals. Paper bowls are also excellent for igloo making, especially for a group of children.
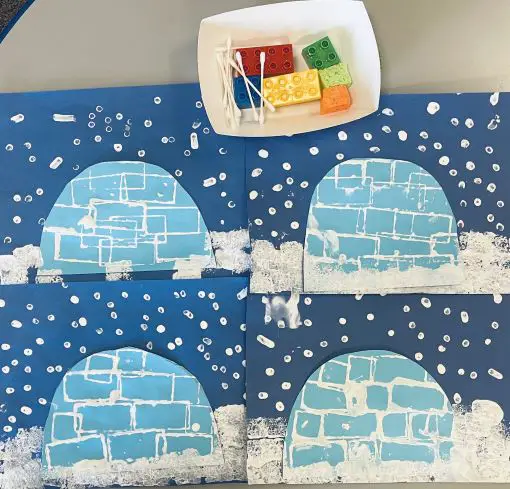
Duplo & Sponge Dip & Paint Igloo Art
Supplies: paper, white paint, scissors, glue, Duplo pieces, dish sponge cut into small squares and a q-tip.
Instructions:
Draw an igloo semi-circle and cut it out.
Glue the igloo to the paper.
Dip Duplo in white paint and stamp igloo to create ice blocks.
Use small square sponges to dip in white paint and stamp the bottom of the paper for snow.
Paint falling snow with a q-tip.
Tip: We also made igloos with rectangle sponges instead of Duplo pieces.
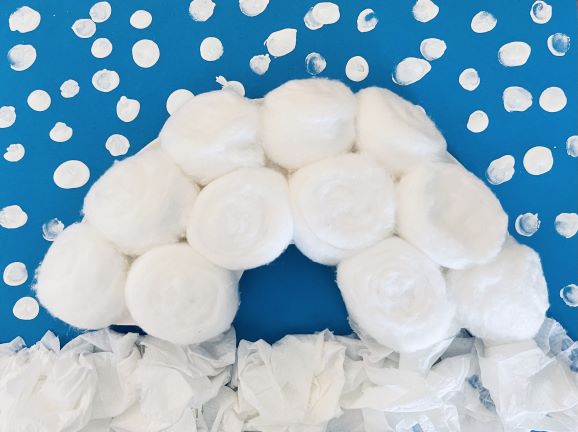
Paper Plate Igloo Art
Supplies: white paper plate, scissors, glue, cotton balls.
Instructions:
Cut the paper plate in half.
Cutout a door for your igloo.
Glue cotton balls on the plate.
Tip: Glue it to paper and continue decorating a winter theme art. We crumpled and glued toilet paper snow on the ground and used our pointers to paint falling snow. Decorate paper plate igloo with different art media if cotton balls are unavailable such as tissue paper or paper towel cut into squares or rectangles.
Cut & Glue Igloo Art
Supplies: white paper, another color paper (gray, blue etc.), glue and scissors.
Instructions:
Draw an igloo semi-circle and cut it out.
Draw vertical lines on the white paper to cut on.
Cut the pieces of paper into rectangles and squares.
Glue the igloo onto the paper.
Glue the rectangles and squares onto the igloo.
Decorate your art with additional snow if you wish.
Egg Carton Igloo
Supplies: egg carton, white paint, paintbrush, and scissors.
Instructions:
Cut the recycled egg carton into small igloos.
Paint the igloos white.
Tip: Place an aluminum foil on the cookie sheet, sprinkle powdered sugar or flour and make a winter village.
Learn 10 Facts About Igloos
Conclusion
Creating art provides children with an opportunity to express themselves improve fine motor skills and have fun. Igloo creations are easy and enjoyable winter art projects for children. Have wonderful wintertime with children and make an igloo today!
If you enjoyed this article, please share it with a friend!
*Kids Groove and Grow is a participant in the Amazon Services LLC Associates Program, as am affiliate advertising program designated to provide means for sites to earn advertising fees by advertising and linking to Amazon.com.
Winter gross motor activities are a fun way to stay active when children remain indoors. Of course, it is more enjoyable to play outside in the beautiful snow, but often we can pretend to have winter activities indoors and work on improving our gross motor skills. Young children enjoy fun and motivating winter-themed exercises.
Winter gross motor activities can be done at home or in the preschool classroom. Get creative with your space and materials and make it fun for children to partake in an inside winter adventure.
Although most of the winter exercises appear easy, they involve coordinating multiple muscle groups and organizing various senses to complete the task. Let’s get started, move around, and have some winter gross motor fun!
Paper Plate Skating
Materials: Paper plates
Instructions: The child receives a pair of paper plates, aka “skates,” and skate around back and forth or around obstacles. Children need to make sure their skates stay on. In other words, they stay on the paper plates and enjoy the skating experience. Make sure to instruct kids to take long strides and use their arm swings for nimble skating moves.
Crumple and Toss Snowballs
Materials: Recycled paper, any small/medium balls you have, and a tossing target.
Instructions: Crumple recycled paper (great fine motor workout) and toss your snowball at the target. If you have additional balls, use them to practice underhand or overhand throw.
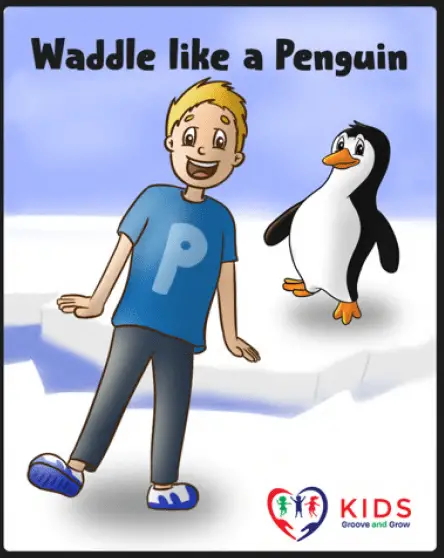
Instructions: Children pretend to waddle like penguins with their arms and legs straight and flexed to the sides. Children can carry an “egg” squeezed between their legs (i.e., balloon, pillow) and shuffle around for an extra challenge.
Polar Bear Walk
Materials: Nothing
Instructions: Children pretend to walk like polar bears on all fours with their bottoms up in the air.
Snowflakes Falling
Materials: Nothing
Instructions: Children pretend to be falling snowflakes. They start with their arm up above the head, with their fingers wiggling and slowly lowering the ground. A lot of different muscle groups working together to coordinate a smooth snowflake falling movement.
Roll like a snowball
Materials: Nothing
Instructions: Children sit on the floor with their knees flexed to the chest and arms wrapped around the knees, rock back and forth like a snowball. Rolling back and forth is a challenging exercise for preschoolers and even older kids. It is a great way to develop core muscles.
Snow Angels
Materials: Nothing
Instructions: Children pretend to make snow angels while lying on their backs. Children move their arms up and down and they move their legs side. Coordinating arm and leg movements simultaneously is a challenging task for young children. Practice makes perfect snow angles.
Jump over a snowflake
Materials: Pretend snowflakes, plastic cups, or pieces of paper.
Instructions: Children practice their jumping skills, jumping over imaginary snowflakes. Whatever your snowflake or maybe a piece of ice. Make sure children keep their feet together and hands on their hips to jump over the winter obstacles.
Conquer Piles of Snow
Materials: Pillows, beanbags, blanket piles,
Instructions: Children pretend to walk and crawl through snow piles and challenge their balancing skills. Be creative with snow obstacles.
Tip: Wear your scarf, hat, and gloves to climb through the snow. Practice without shoes to challenge your balance.
Conclusion
Winter is a fun season for children to experience. Unfortunately, there are a lot of times when we need to stay indoors during winter. When the weather is less than perfect, or we cannot venture outside, we can always practice our gross motor skills indoors. Do not let the wintertime slow your kids down, keep moving!
If you liked this article please share with a friend!
Snowflakes are rare where we live in Arizona. Thus, we make sure to educate our young students on how winters look in states with four seasons and other places worldwide.
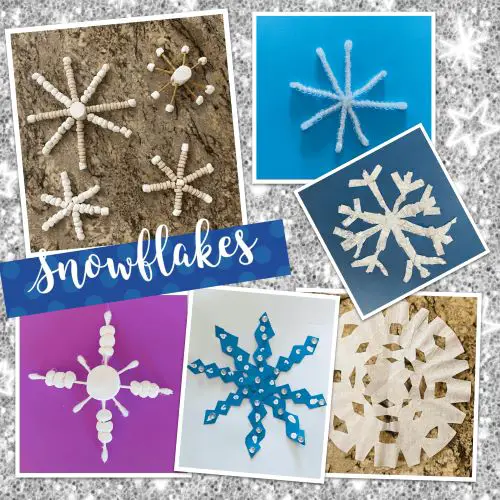
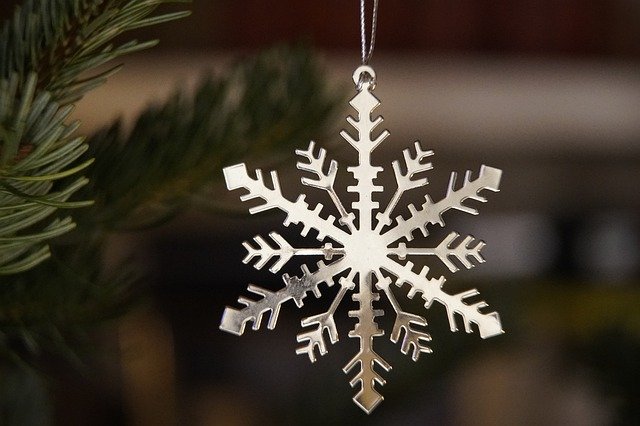
Wintertime is a perfect time to create beautiful and unique snowflakes arts and crafts with children. The 10 snowflakes ideas below are fun and easy. Most of the supplies you will find around your house, or a quick trip to a dollar store might be worthwhile to create your charming snowflakes. Boost creativity and fine motor skills and design a snowflake today!
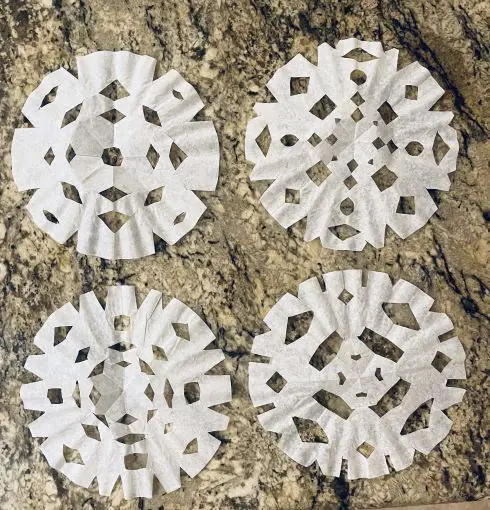
Coffee Filter Snowflakes
Supplies: round coffee filters and scissors
Instructions:
Fold the coffee filter in half, fold again, and fold one more time, so it looks like a pizza slice.
Make sure it is nice and flat.
Start cutting out different shapes around the sides of the folded coffee filter.
Make sure children cut a triangle, circle, square, rectangle, and snip the paper’s sides.
Cut different shapes around three sides of the folded paper.
When done, unfold to discover a unique snowflake.
Tip: If you do not have round coffee filters, kids can use white paper, precut into circles, and follow the process of folding and cutting. Coffee Filters.
Lacy Snowflakes
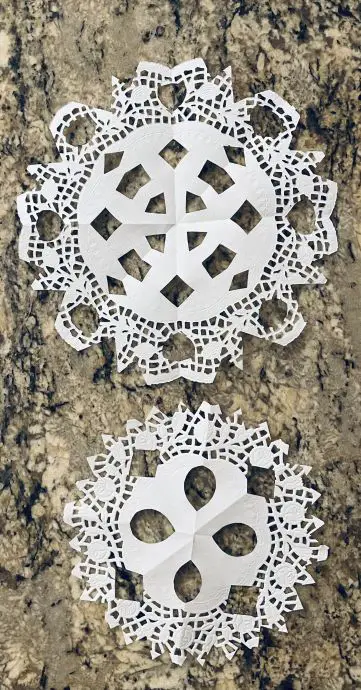
Supplies: doilies and scissors (I bought a pack of 32 doilies in a dollar store).
Instructions: The instructions are the same for the coffee filter snowflakes above, as dollies are round and lacy. Make sure you separate doilies as they are thin and easily stick together. Additionally, it is trickier for kids to cut shapes using laced paper.
Supplies: mini marshmallows, medium/large marshmallows, pretzel sticks, cheerios, and toothpicks/wooden craft sticks.
Instructions: Compose your intricate snowflake design and eat it after if you wish.
Crystal Snowflake
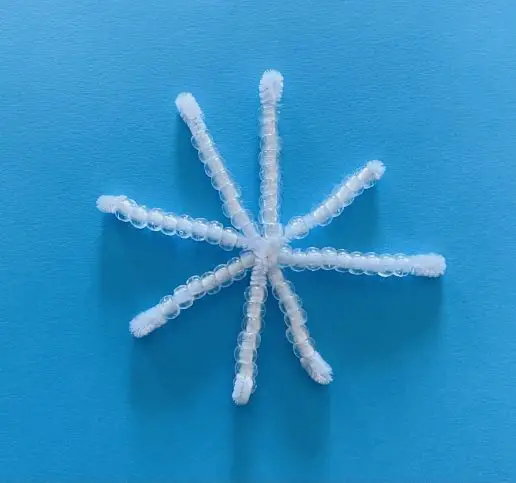
Supplies: white pipe cleaners and small clear beads.
Instructions:
Cut 3 or 4 white pipe cleaners in half depending how many sides you want, 6 or 8 (I read that all snowflakes have six sides, but for children’s craft purposes, we do not follow this rule).
Twist pipe cleaners in the middle to create a star—lace beads on the pipe cleaners.
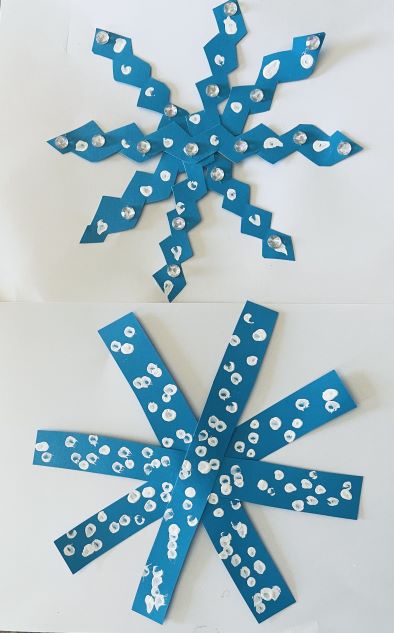
Supplies: blue paper, scissors, glue, q-tip, white paint, and optional glitter and stickers.
Instructions:
Draw 3 or 4 vertical lines on the piece of paper, about 1 inch apart.
Cut across the lines until you have 3 or 4 paper strips.
Arrange a plus sign with two paper strips and glue it in the middle. Add a third and fourth line to make a start and glue paper strips in the middle.
Now you have created a snowflake.
Dip q-tip in white paint and decorate your snowflake with snow. Add glitter on top if you desire.
Tip: Cut sides of the paper strips to create unique designs and practice additional scissor skills. Create pointy ends and add patterns to the sides. Attach snowflakes to the window or glue them to the white paper. Dip pointer finger in the paint if you don’t have access to q-tips. White paint and Rhinestone Stickers.
Storm of Snowflakes
Supplies: dark paper and white marker, chalk, or crayon.
Instructions:
Practice drawing various snowflake designs and sizes. Children need to draw vertical lines, horizontal lines, diagonal lines, and combine lines to create a snowflake.
Teach children first to draw a plus and then add long diagonal lines through the middle. If this is hard, then we work on drawing short diagonal lines to meet the center.
Decorate your snowflake with additional line designs on the arms of the snowflake, add detail, and let kids draw their snowflake designs.
Tip. For teachers and therapists teaching virtually on zoom, use the whiteboard to demonstrate a step-by-step snowflake drawing. White Markers, White Crayons, and White Pencils.
Puffy Snowflakes
Supplies: q-tips, mini marshmallows, and medium/large marshmallows.
Instructions:
Cut some q-tips in half.
Place a big marshmallow in the middle.
Insert long and short q-tips into the larger marshmallow. Place mini marshmallows on q-tips to make your snowflake design.
Place mini marshmallows on q-tips and then insert them onto the center marshmallow if you prefer.
Shiny Snowflake
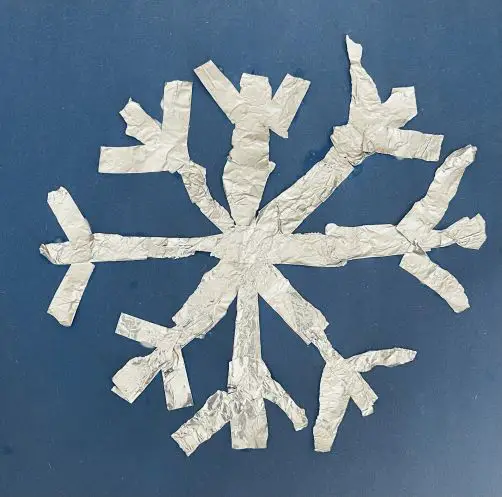
Supplies: template with a snowflake, or pre-draw a snowflake on paper, glue, and aluminum foil strips.
Instructions: Rip small pieces of aluminum foil and glue them onto the snowflake.
Tip. Crumple white tissue paper instead of aluminum foil.
Hand Print Snowflake
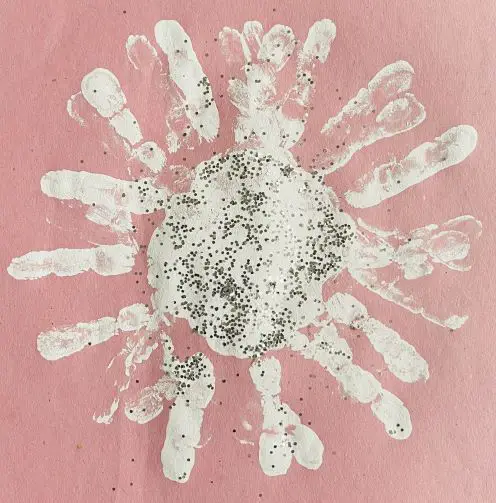
Supplies: white finger paint, paintbrush, paper, and glitter optional.
Instruction: Apply white paint on hand with paintbrush, press hand on paper, repeat around to create a snowflake with handprints. Sprinkle glitter on top if desired.
Toilet Roll Snowflakes
Supplies: recycled toilet paper roll, white paint, and paper.
Instructions: Create two creases on the toilet paper roll Dip the paper roll in white paint and create a snowflake design. Children can copy a specific snowflake design or create their own.
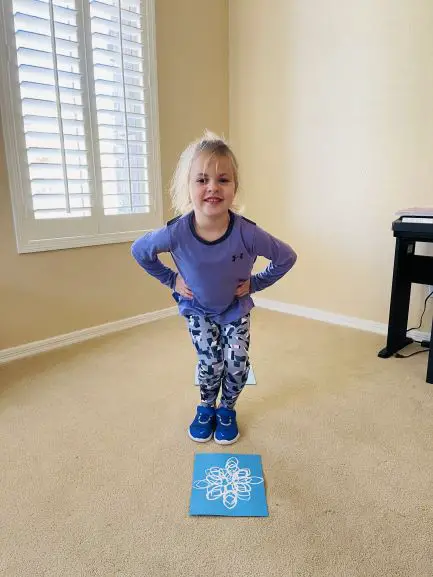
If you need a movement break during snowflake making process, enjoy a snowflakes song and dance.
Conclusion
Creating art provides children with an opportunity to express themselves to improve fine motor skills and have fun. Let the snowflakes’ creations begin!
If you enjoyed this article, please share it with a friend!
*Kids Groove and Grow is a participant in the Amazon Services LLC Associates Program, as an affiliate advertising program designated to provide means for sites to earn advertising fees by advertising and linking to Amazon.com.
Animal walk exercises are fun and motivating movement activities for young children. They offer many benefits for the mind, body, and spirit. Children enjoy using their imagination to act like animals. It is an engaging and creative way to be active. These enjoyable and challenging exercises promote the development of crucial physical, academic, and emotional milestones.
Animal walk exercises are a great way to get kids moving. Children have an opportunity to practice a variety of imaginative movements that support the development of balance, coordination, flexibility, endurance, and strength. Animal walks encourage movement created by a child’s own body weight. Undoubtedly, integrating bodyweight exercises lays the groundwork for future growth.
Furthermore, research confirms early childhood exercise supports social and emotional skills, longer attention spans, and academic achievement.
“The early Greeks knew well the close relationship between physical and intellectual development. They cautioned that the mind and the body are inseparable. In our schools the physical and the intellectual are often treated as separate and unrelated aspects of the child.” (Church, 2015)
Whether indoors or outdoors, animal walk exercises are a great way of practicing movement. No special equipment is necessary to enjoy the numerous benefits of this fun activity. These motivating exercises provide a positive influence on a child’s development in many ways. Let’s explore the top benefits.
Animal walk exercises are the essence of physical advancement for young children. These physical activities combine muscle strengthening, coordination, endurance, balance, and flexibility.
Children learn to use large muscle groups for fun movements against gravity and learn to work with the resistance of their own body weight. They work on strengthening core muscles, as well as leg and arm muscles.
Additionally, animal walks promote small muscle group strength. When children use their arms, wrists, and hands to pretend to walk like different animals, it advances hand development. Some classic examples of upper extremity strength walks include; crab walk, bear walk, and donkey kicks.
When children participate in different animal walks, they need to change body positions and adjust movements into an organized animal action. Moving little arms and legs in different goal-oriented ways is an excellent way to improve coordination.
Furthermore, tasks that require coordinated movement also require good motor planning to attain movements accurately. Animal walks are a great way to work on organizing new movement patterns.
When children start learning a new movement, it is difficult to perform at first. However, with practice and repetition, children create muscle memory to complete the task spontaneously. They generate new connections and set movement patterns for life.
Several animal walks focus on stretching and lead to increased muscle flexibility. Consequently, better flexibility will improve physical performance, such as balance and posture.
Early on, young children work on keeping steady to advance balance skills. Animal actions that involve jumping, hopping, skipping, and standing on one leg or walking on toes develop balance. In other words, balance is the ability to move or to remain in a position without losing control or falling.
Animal walk exercises are enjoyable activities and provide multiple physical benefits to young children.
“Sensory integration is the process of organizing sensory inputs so that the brain produces a useful body response and also useful body perceptions, emotions, and thoughts.” (Ayers)
Animal walk exercises are sensory-rich activities that nurture healthy brain connections. These playful exercises are an excellent way for the purposeful organization of sensory input.
Children benefit from actively participating in a variety of novel and meaningful sensory experiences to develop new brain connections. As a result, more connections form, and a child’s capabilities for learning advance.
“Over 80% of the nervous system is involved in processing or organizing sensory input, and thus the brain is a sensory processing machine.” (Ayers)
Animal walk exercises provide a powerful dose of sensory input to a young child. All animal actions engage multiple senses, such as sense of touch, vision and hearing, as well as vestibular and proprioceptive processing.
Vestibular-proprioceptive activities refer to the simultaneous sensations of the head, arms, and legs when a child engages in active movement. These activities are also known as heavy work activities, and help children develop the body in space awareness.
Body awareness is important for the ability to move efficiently and confidently. Furthermore, it helps children develop gradings of pressure and force, such as gauging the amount of effort to pick up a light pencil or a heavy bag pack.
Animal walk exercises are an excellent way to integrate sensory processes through play. Combining sensory and movement opportunities help children develop enhanced abilities for learning.
Sensory integration is the underlying foundation for academic learning and appropriate social behavior.
“Study after study shows that physical activity activates the brain, improves cognitive function, and is correlated with improved academic performance.” (Donnelly & Lambourne, 2011).
Academic performance describes factors that may influence student success in school. It includes abilities in executive functioning, academic behavior, and academic achievement.
Physical activity improves brain health. It helps children to learn, think, and remember. Children who participate in physical activity tend to have improved attention, information processing, and memory skills. These children show increased organization, planning, and impulse control abilities. Additionally, physical activity positively influences students’ reading, math, and language arts aptitudes, as well as test scores.
“How does exercise improve learning? Engaging in physical activity increases blood flow and oxygenation in the brain, boosting neural connectivity and stimulating nerve cell growth in the hippocampus, the center of learning and memory.” (edutopia.org)
Animal walks are a perfect way to complement effective learning. It can be designed as a fun exercise lesson or short movement break to balance a stationary, academically filled school day.
“Exercise may prove to be a simple, yet important, method of enhancing those aspects of children’s mental functioning central to cognitive development.” (Tomporowski, 2007)
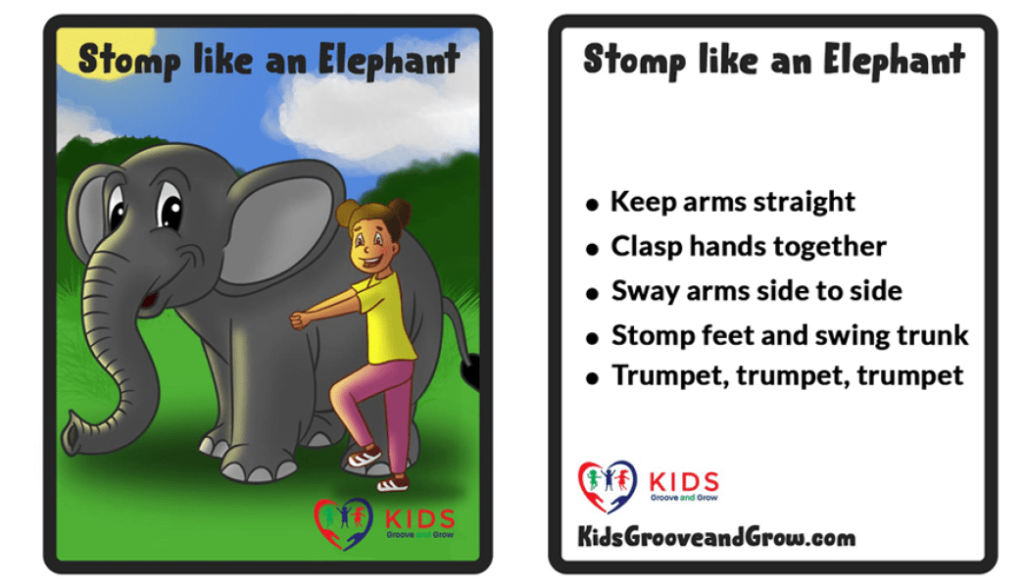
Boost children’s concentration and focus by providing regular movement breaks throughout the day! Stomp like an elephant, run like a cheetah or move like an inchworm.
Once again, increasing evidence supports the multiple benefits of physical activity on emotional health. Physical activity has a direct impact on a child’s behavior and emotional wellbeing.
Children who regularly participate in movement activities tend to be in a happy mood and have an enhanced ability to cope with different feelings and stressful situations. They are more adaptable, resilient, and adept at emotional communication.
Physical activity assists children with adequate energy levels, improved sleep, and an overall sense of control and wellbeing. Children demonstrate increased self-esteem, positive social interactions, and fewer behavior problems.
Adversely, when children exhibit difficulty with regulating emotions, demonstrating appropriate attention and/or challenges with appropriate behavior, movement breaks could assist calming and self-regulation.
Emotional regulation is a critical component of learning success. Managing feelings, inhibiting behavior, and focusing attention on important tasks is a sophisticated skill for young students. Furthermore, controlling mood, remaining calm, delaying gratification, tolerating unexpected changes, and staying motivated can be a struggle for many learners.
“Exercise promotes chemicals in the brain that improve your mood and make you more relaxed. Specifically, the brain releases feel-good chemicals called endorphins throughout the body. Physical activity reduces anxiety and depresses mood, and enhances self-esteem.”
Mindful movement positively affects our emotions and improves our mood. Implementing regular brain breaks throughout the day will pay off with happier and more capable children. Animal walk exercises provide fun time-out for children and support emotional regulation.
Animal walks are fun and motivating movement activities for children 3 to 10 years old. These enjoyable and challenging exercises promote physical, sensory, academic, and emotional growth. Animal walks can serve as a skillful exercise session, a quick movement break from stationary academic work, or a fun physical challenge for the whole family. These exercises offer engaging and creative ways to help our children improve strength, stay active, support self-regulation, become mentally sharper, and navigate the day in a happier state of mind!
If you enjoyed this article, please share it with a friend!
References
Ayers, A.J., (2005). Sensory Integration and the Child, Understanding Hidden Challenges. Western Psychological Services.
Best, J.R, (2010). Effects of Physical Activity on Children’s Executive Function: Contributions of Experimental Research on Aerobic Exercise, Science Direct, Developmental Review, Volume 30, Issue 4. https://www.sciencedirect.com/science/article/abs/pii/S0273229710000304
Church, K.R., (2015). Children’s Exercise: Facts and Fiction, University of Maryland College Park, Maryland.
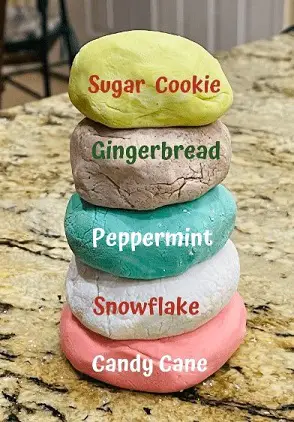
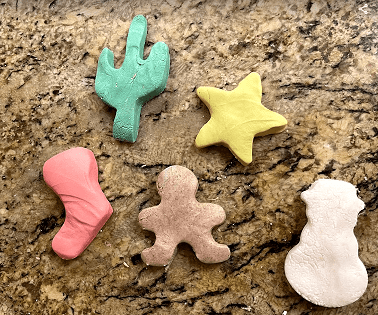
Holiday frosting playdough is easy, edible, and fun play for children of all ages. All kids love playing with playdough, and the idea of making frosting playdough adds an extra dose of enjoyment. It is quick to make, and no cooking is required. Safe for toddlers, exciting for preschoolers, and delightful for older kids. It is a fun sensory experience. Mix it, feel it, squeeze it, smell it, taste it, and have a blast!
The recipes are similar with variations for particular dough type. I find it easier to get white frosting and add food coloring for specific recipes. However, you might come across already colored frosting and skip the coloring step. Additionally, if you use food coloring, make sure to poke a little hole in the playdough and squeeze food-coloring drops inside to prevent your hands from stains.
Let’s have fun with 5-holiday frosting playdough DIY recipes.
How to make Candy Cane Frosting Playdough
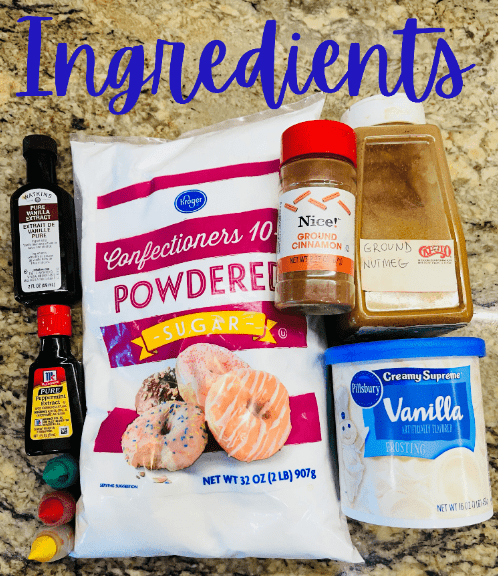
Ingredients
White frosting – 1 cup
Powdered sugar – 2 cups
Peppermint extract- few drops
Red food coloring – few drops
Mix frosting with powdered sugar, add food coloring and peppermint extract.
How to make Peppermint Frosting Playdough
Ingredients
White frosting -1 cup
Powdered sugar -2 cups
Peppermint extract-few drops
Green food coloring-few drops
Mix frosting with powdered sugar, add food coloring and peppermint extract.
How to make Gingerbread Frosting Playdough
Ingredients
White frosting – 1 cup
Powdered sugar – 2 cups
Nutmeg – 2 teaspoons
Cinnamon – 2 teaspoons
Mix frosting with powdered sugar, add nutmeg and cinnamon.
How to make Sugar Cookie Frosting Playdough
Ingredients
White frosting – 1 cup
Powdered sugar – 2 cups
Vanilla extract – few drops
Yellow food coloring – few drops
Mix frosting with powdered sugar, add food coloring and peppermint extract.
How to make Snowflake Frosting Playdough
Ingredients
White frosting – 1 cup
Powdered sugar – 2 cups
Mix frosting with powdered sugar.
It is time to enjoy our playdough! Use your favorite cookie cutters, roll or stamp shapes and letters, add glitter or sprinkles for some extra fun!
If you liked this article, please share it with a friend!
The holiday season is a wonderful time to create Christmas tree art with kids. Why not get creative and make some beautiful, fun, and easy Christmas trees. Most of the materials you will find around your house. Additionally, a quick trip to a dollar store might be worthwhile for specific items you might need.
Let’s create original tree designs, boost fine motor skills, and enjoy the special moments with your kids.
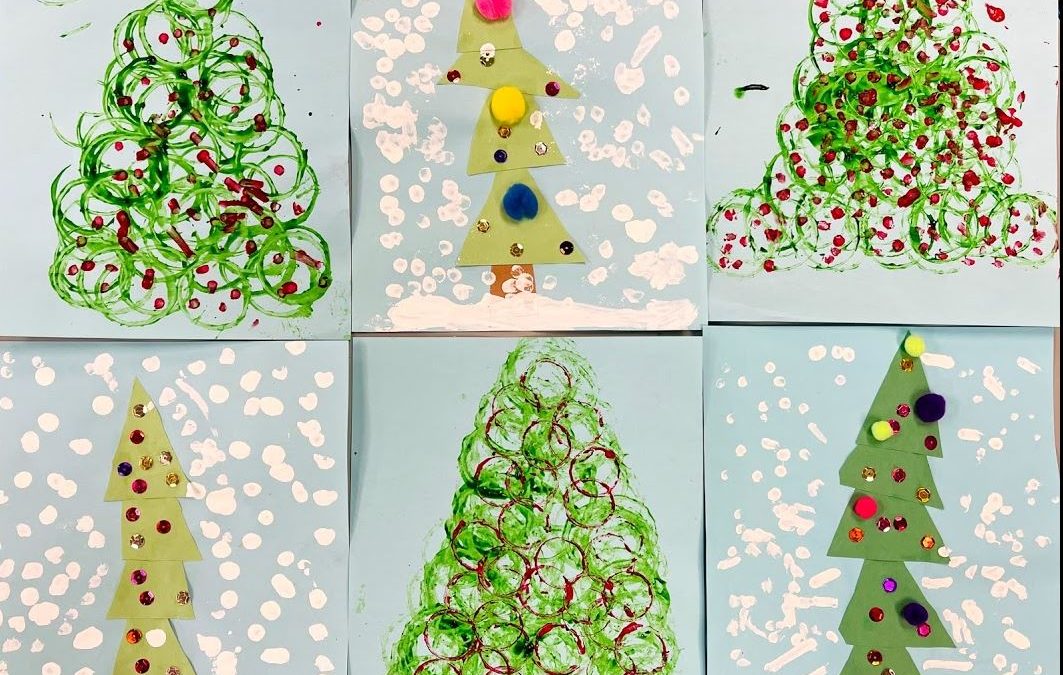
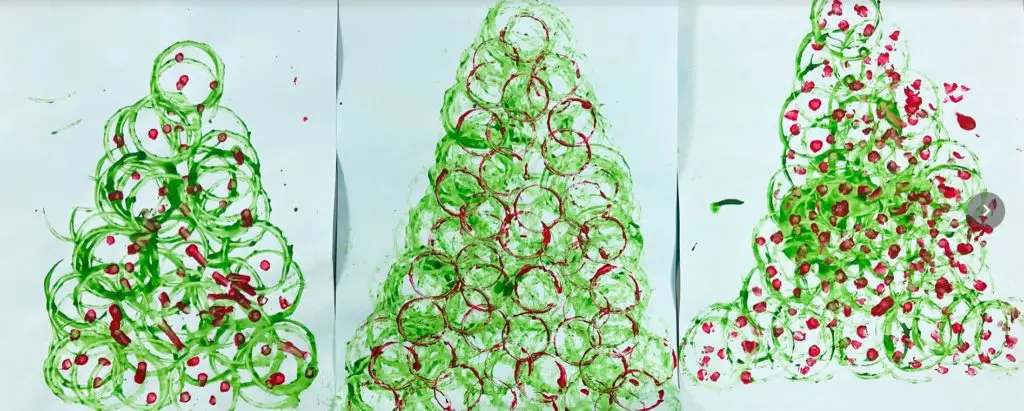
Circle Stamp Christmas Trees Art
Supplies: paper, green paint, additional paint for decorations, empty toilet paper roll or paper towel roll, other tops from water/juice bottles, and q-tips.
Instructions: Dip the toilet roll in green paint and stamp the paper to create a tree shape. Use smaller bottle tops or q-tips and dip in a different color paint to decorate the tree.
Decorated Christmas Trees in the Snow
Supplies: paper (not white) for background, green paper, a small piece of brown paper, scissors glue, decorative beads, sequin or pompoms, white paint, and q-tips.
Instructions: Cut green paper into a 2-3 inch paper strip; draw a zigzag on the paper strip and cut on the zigzag line, which will create triangles. Glue triangles onto the paper to build a Christmas tree. Glue a brown rectangle to make a tree trunk. Glue decorations onto the tree. Dip q-tip in white paint to paint the snow.
Fork Painted Christmas Trees
Supplies: paper, fork (we used plastic), green paint, additional paint for decorations, q-tip.
Instructions: Dip the fork in green paint and paint it on paper to create a tree shape. Dip q-tip in different color paints and decorate the tree.
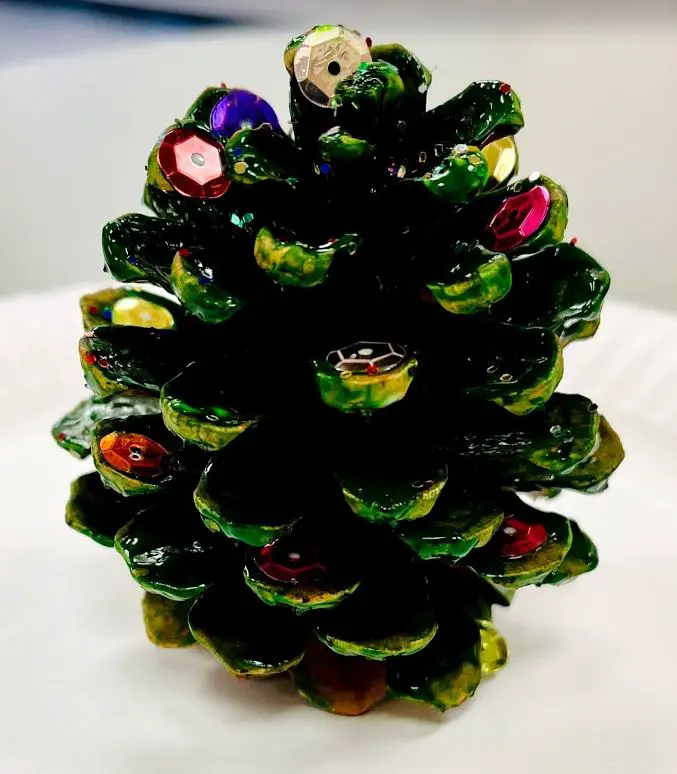
Pinecone Christmas Tree
Supplies: green paint, paintbrush, pinecone (we collect our pinecones when we camp, they are available in the dollar store), optional collections include decorations, glue, and glitter.
Instructions: Intricately paint the pinecone, and decorate it if you wish.
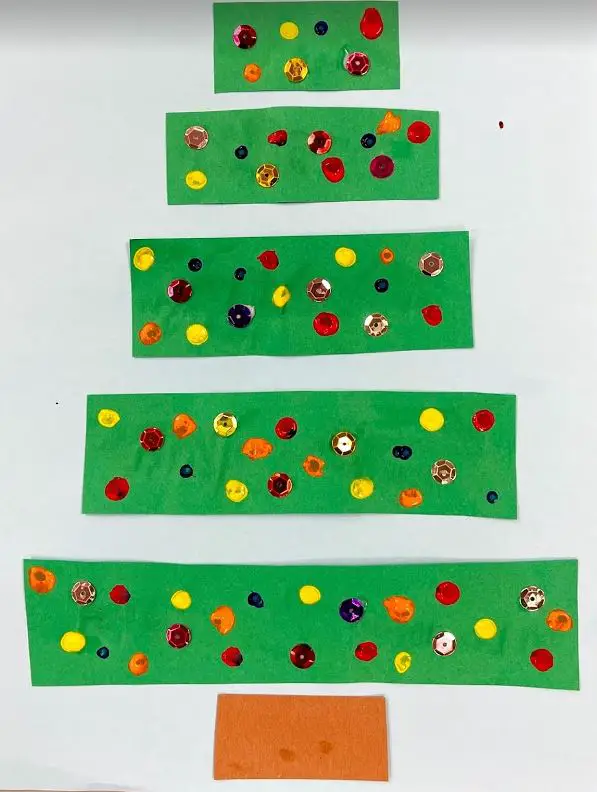
Rectangle Christmas Tree
Supplies: green and brown paper, and desired color paper for your background, scissors, glue, decorations for the tree (sequin, stickers, paint, markers).
Instructions: Cut the green paper into 1-3 inch paper strips and cut the strips into various lengths, gluing longest on the bottom and shortest on top to make a tree—glue short brown rectangle bottom for the trunk. Decorate your tree.
Triangle Christmas Tree
Supplies: green paper, background paper, a little piece of brown paper, scissors, glue, and stickers.
Instructions: Cut green paper into different shape triangles, arrange and glue triangles to form a Christmas tree. Glue brown triangle at the bottom for the trunk. Decorate your tree with stickers.
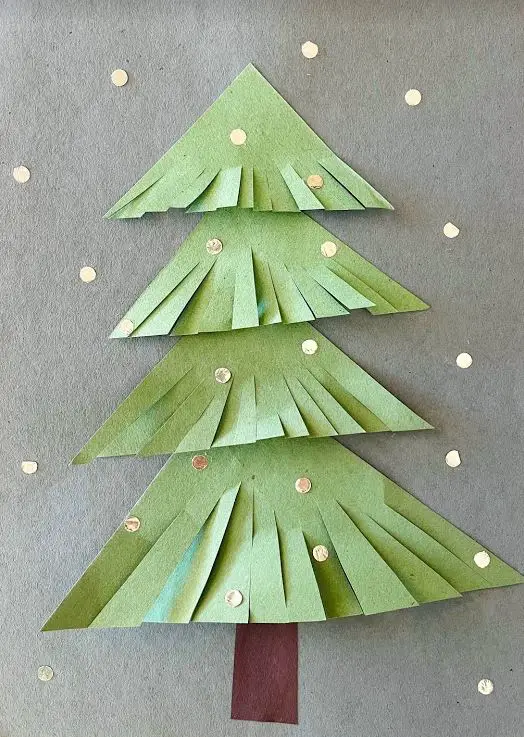
Ruffled Christmas Tree in the Snow
Supplies: paper for the background, green paper, a small piece of brown paper, glue, scissors, aluminum foil, hole puncher.
Instructions: Cut green paper into triangles of various sizes, snip multiple ruffles at the triangles’ base. Glue triangles from biggest to smallest to create a Christmas tree. Glue brown trunk at the bottom. Hole punch aluminum foil to make shiny snow and glue it to your picture.
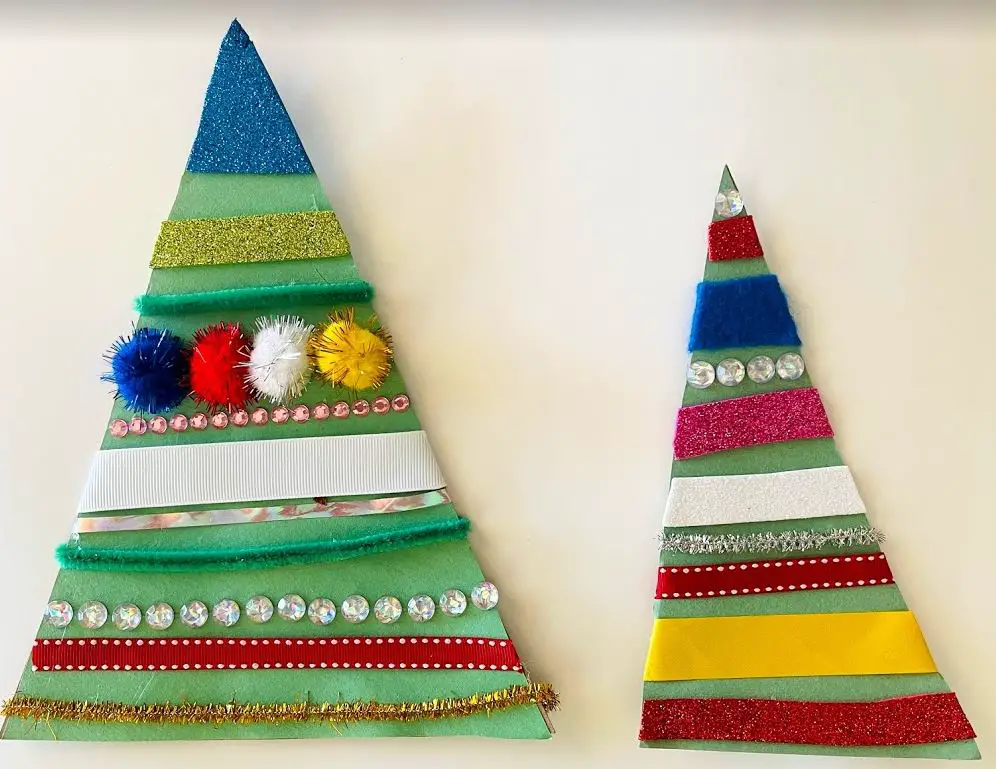
Stripped Christmas Trees
Supplies: green paper, cardboard (shoebox or cereal box), stripes (various media such as ribbons, colored paper, pipe cleaners, bedazzles, pompoms), hot glue.
Instructions: cut out a triangle from cardboard, glue a matching green paper triangle onto the cardboard, glue colorful stripes to decorate the tree.
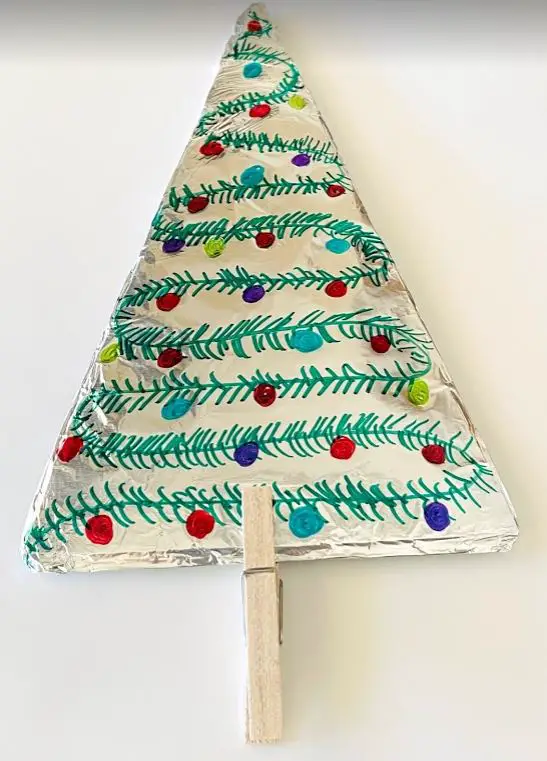
Foil Christmas Tree Art
Supplies: cardboard, aluminum foil, and sharpie markers, and clothes pin-optional.
Instructions: cut out a triangle from cardboard, cover it with aluminum foil, draw decorations with sharpie markers.
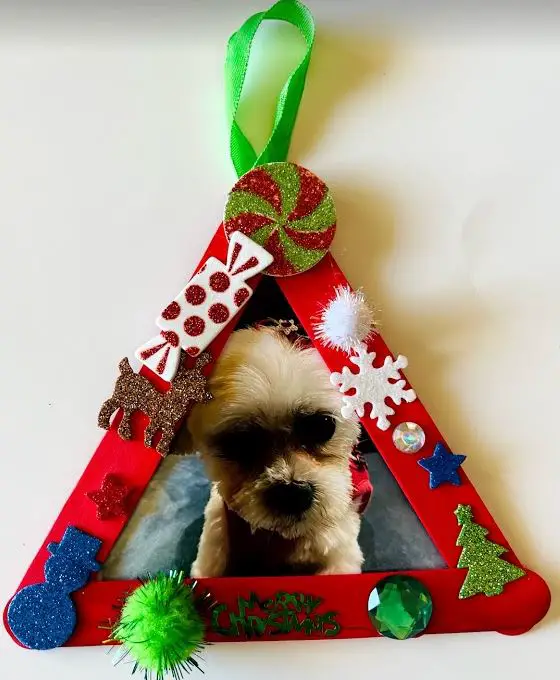
Christmas Tree Ornament
Supplies: (3) popsicle sticks, paint, stickers and decorations, hot glue, short ribbon, and optional photo.
Instructions: Paint popsicle sticks with desired color paint, wait to dry, and then decorate it. Hot glue popsicle sticks to form a Christmas tree. Hot glue ribbon loop at the top. Cut and glue the picture to fit the tree opening if desired.
Conclusion
Creating art provides children with an opportunity to express themselves, improve fine motor skills, and have fun. Let the creations begin! Happy Holidays!
If you enjoyed this article please share it with a friend!
Fun and educational games for kids ages 6 and up, provide opportunities for learning. Children understand to follow the rules, take turns, focus on the game, and accept wins and losses. Many games include math concepts, reading fine motor manipulation, hand-eye-coordination, and visual perceptual skills practice. Concentrating on game strategies and figuring out creative game solutions boosts reasoning, and thinking skills. The best aspect of playing games with friends and family is enjoyment, bonding, and laughter!
Operation Game
Operation is a classic family game. Kids use the tweezers to operate on Sam to make him feel better. Players choose a card a doctor card and maneuver to remove the ailment from Sam. Players collect money if they can carefully avoid the buzz. Sam’s Cavity includes 12 funny illnesses; Adam’s apple, butterflies in the stomach, funny bone, wishbone, and bread basket — in their place are slightly modernized (for the most part) ailments such as headphone headache, gamer’s thumb, cranky knee, frostbite, heartburn, hangnail, ringing in his ear and rumbling tummy. The player with the most money wins. For 1 or more players, game for kids ages 6 and up. Let’s scrub in!
Perfection Game
Perfection is a blast from the past developed by MENSA for kids. Players compete to be the first to fill in all the 25 shapes in their respective spots. Set the timer and complete the task before the tray pops. The player who completes the game in the shortest time wins. Play without the timer, so it is easier for younger players (perfection with fewer and bigger pieces is also available to younger kids). Children practice valuable skills, including focus, dexterity, hand-eye coordination, and visual perceptual skills. For 1 or more players, game for kids 6 and up. Ready, set, go!
Connect 4 Game
Connect 4 is a classic disc dropping game. Drop your red or yellow discs vertically, horizontally, or diagonally. Will you start in the middle or at the edge? Make sure you watch your opponent and block their attempts. When you get four-in-a-row, you win. For 2 players, game for kids ages 6 and up. Fun classic strategy game.
Jenga Game
Jenga is a classic stacking tower game that families enjoyed for generations. Slide-out wood blocks one by one and place them on top of the stack. Plan your strategy; every move counts. Stack and balance the blocks and keep the tower from crashing. This game includes 54 precision-crafted hardwood blocks, along with an easy-to-use stacking sleeve to help build the perfect tower. For 1 or more players, game for kids ages 6 and up. Let’s Jenga!
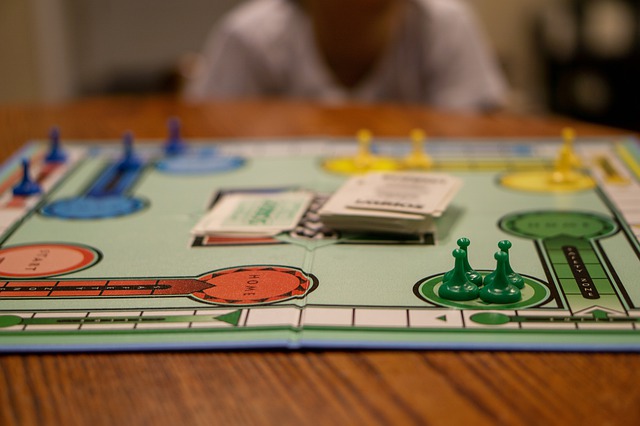
Sorry! Board Game
Sorry is a game of sweet revenge. Each player starts with 4 pawns. The game’s goal is to get all your pawns from the start to home by traveling around the board. Players move their pawns by drawing cards to see how many spaces you can proceed. Read the cards carefully for specific rules for example; a number 11 will allow you to move 11 spaces or switch spaces with your opponent; another card might say to move backward 4 spaces or split the number between any 2 pawns. If you land on a triangle, slide to the circle and bump all the pieces on your way. You may not share the space with another pawn; therefore, the other player’s pawns go back to the start. For 2-4 players, game for kids ages 6 and up. Oops, sorry, but are you sorry?
Checkers & Tic Tac Toe
Checkers & Tic Tac Toe is 2 in 1 reversible game board. Both games are classic strategy games that genuinely do not need much explanation—an excellent way to stimulate young minds and have fun. For 2 players, game for kids ages 6 and up. Timeless games of logic.
Hedbanz Game
Hedbanz is a fun family guessing game. Every player wears a headband, draws a card, and without looking, inserts their card into the clip on their headband. The player asks, “what am I?” and asks yes and no questions to figure out what the picture represents. Ask questions and make connections that will lead you to answers. Race against the one-minute sand to guess your card and win. For 2-4 players, game for kids ages 6 and up. Fast-paced, energy-packed, witty, and humorous.
The Game of Life
Game of Life is a board game where players are in charge of their life path. Head to college or forget higher education and get a job. Venture down the family path, start a career, or go down the risky path. If you initially skipped college but choose to go back and get a degree, you will have the opportunity to go to night school and get a better job. Adopt pets, have kids, celebrate life’s milestones. The goal is to retire rich. The player who retires with the most wealth wins the game. For 2-4 players, game for kids ages 6 and up. Younger players might need help with reading cards but still enjoy the game—experience a life of action, adventure, and surprises. Awesome family time!
Blokus Game
Blokus is a Mensa award game promoting healthy brain activity. Each player gets 21 pieces in one color (red, yellow, blue, or green) and needs to fit as many pieces on the game board as possible. Start at the corner and match your piece’s corner to the corner; you cannot place your block’s side by the side. Be the first one to put all your blocks on the board. The player with the least amount of pieces left wins. For 4 players, game for kids ages 6 and up. The game can be played by 2 players controlling two colors if 4 players are unavailable. Excellent family game with endless brain-boosting strategy
Kerplunk Game
Kerplunk is a game with sticks, marbles, and a translucent tube. Players design a web of sticks midway in the tower and pour marbles over the top. Then, players take turns to skillfully remove one stick at a time and try their best not to drop a marble. Eventually, all marbles will go “Ker Plunk!” The player with the least amount of marbles wins the game. For 2-4 players, game for kids ages 6 and up. Quick, easy, and exciting. Be cool and precise, focus, and do not let the marbles drop.
If you enjoyed this list of fun and educational games for children aged 6 and up, please share it with a friend!
Fun and educational preschool games provide opportunities for early learning. Children learn to follow the rules, take turns, focus, and accept wins and losses. Many games include early math concepts as counting, sorting, addition, and subtraction. The majority of the games include fine motor manipulation, hand-eye-coordination, and visual perceptual skills practice. Concentrating on game strategies and figuring out creative game solutions boosts reasoning, and thinking skills. The best aspect of playing games with friends and family is enjoyment, bonding, and laughter! Let’ play!
The Sneaky, Snacky Squirrel Game
The sneaky, snacky squirrel is hungry! The squirrel needs your help to collect all different color acorns to fill her log. Spin the wheel, squeeze the matching colored acorn with your squirrel squeezers and match it into your log. The first child to fill the log with delicious acorns wins the game. Sounds simple, but you can also lose a turn, you can steal an acorn or another player can steal an acorn from you, and the wind can blow all your acorns away. For 2 to 4 players, award-winning preschool game. A game of strategy for sneaky squirrels!
Candy Land Board Game
Candy land Kingdom of Sweet Adventures is a simple and fun board game. Players go through a colorful winding pathway from start to finish. Draw a card and move your gingerbread character pawn to designed places on the candy land trail. The first person to reach King Kandy’s Castle wins. Your journey will include all kinds of delicious surprises such as; Gingerbread Tree, Peppermint Forest, Gum Drop Mountain, Peanut Acres, Lollypop Forest, Ice Cream Sea, Chocolate Swamp, and Candy Castle. You can get ahead if you land on Rainbow Trail and Gumdrop Pass, or you might be stuck on the licorice space. For 2 to 4 players, kids’ imaginations soar as they make their way to the castle to win!
HiHo Cherry-O Game
HiHo Cherry-O is a classic beginner board game. Kids have a blast picking fruit from the trees and filling their buckets. The player spins the wheel to know the number of fruit pieces to pick or put back. The first person to fill their basket wins. Fun math practice as children count, add, and subtract. Great way to enhance grasp while using little fingers to pick up the fruit. For 2 to 3 players, fruity delight with cherries, blueberries, and apples.
Greedy Granny Game
Greedy Granny loves sweets, and she is not good at sharing! Steal the treats without waking up a snoozing Granny. Take turns to spin the treat wheel, see where the arrow lands and follow what it says. You will take a treat from the tray, put the treat back, take one from another player, or miss a turn. Players also press a purple button next to the sleeping Granny and hope she will not wake up. If Granny wakes up, the player needs to return all treats to the tray. The player that collects all four kinds of goodies wins the game. For 2 to 4 players, suspenseful silly game that might have Granny’s teeth flying.
Bed Bugs Game
Bed Bugs is a critter catching fun. Players start the game by picking colored tweezers to catch matching colored bugs. Press the bed button to bounce the bugs and race to collect your jumpy bugs. The first player to capture all their bugs wins the game. Excellent for fine motor control and hand-eye coordination. Younger children can play one at a time or pick up bugs with fingers. For 2-3 players, stop the itchiness with this hysterical bug-catching race.
Don’t Wake Daddy Game
Don’t Wake Daddy while you sneak your way to the refrigerator to grab a night snack. The kids are hungry and noisy. Players can wake Daddy by turning on the TV, falling off a tricycle, stepping on toys or cat’s tail, waking up the dog, smashing pots and pans, playing music, and more. Each player spins the wheel and goes to the designated spot. When you land on a picture-number space, you need to press the snooze button on daddy’s alarm clock and risk waking Daddy. However, if you have a matching picture card, you are safe. If daddy wakes up, you need to return to bed and sneak your way to the refrigerator again. For 2-4 players, hilarious anticipation for Daddy waking up.
Pop the Pig Game
Pop the Pig is a hamburger eating and belly-busting game. Players feed the pig and watch him getting bigger until his belly pops. Players roll the die and pick the right color burger. Press the pig’s head down every time you feed him and pump his belly the number of times it says on the burger. Watch the belly get bigger and bigger. If the belly pops open on your turn, you win! The game helps with number and color recognition. For 2-4 players, exciting and straightforward game.
Whack-A-Mole is a popular arcade game. Sharpen your hand-eye coordination speed as the mole lights up so you can whack it with a soft hammer. Whack as many moles as you can at the precisely right time. The game has different speed levels, and the challenge increases gradually. A small screen provides easy score tracking. Take turns with as many players as you wish. Whack-A-Mole is an interactive, addictive, and cute game.
If you enjoyed this list of fun and educational preschool games, please share it with a friend!
*Kids Groove and Grow is a participant in the Amazon Services LLC Associates Program, as an affiliate-advertising program designated to provide means for sites to earn advertising fees by advertising and linking to Amazon.com.